In this journey, the key isn't to immediately master complex techniques. It's about starting simply, and gradually enhancing your skills.
Drawing, especially for beginners, should be an exciting exploration, not a daunting task. It’s important to begin with the basics, to understand the foundation. This guide is about that – starting with simple lines, moving to line quality, and then to more intricate aspects. It’s designed to produce immediate, skillful results that keep you motivated.
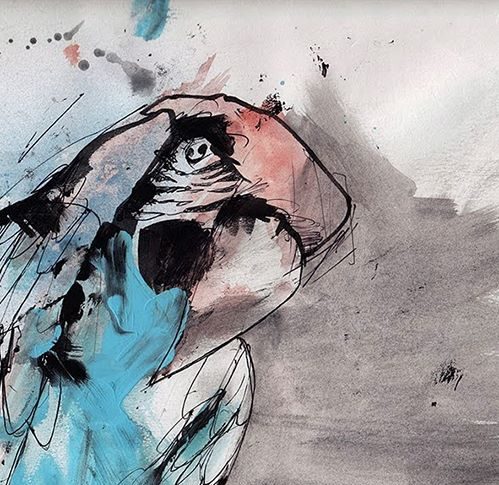
Remember, the aim is not to create a perfect photorealistic image, but to capture the spirit of what you see with loose, gestural strokes. This approach keeps your drawing lively and your interest piqued. Let’s start this journey with the basics and watch as your skills flourish.
1. Contour Line Drawing
Contour line drawing is where every artist begins. It’s simple. You look at something and draw the lines that define it. No shading, no complex textures, just pure, simple lines. This technique teaches you to see shapes, to understand forms.
As I practiced contour drawing, I learned it's not just about drawing lines, but about seeing. You learn to observe the world in a different way. A chair isn't just a chair, but a series of interconnected lines and shapes.
For beginners, this is liberating. There’s no pressure to render every detail. Your focus is on the outline of your subject. Start with objects around you. A cup, a pair of glasses, a plant. Draw these objects as you see them, focusing only on their outer edges.
This simplicity is not just about making drawing easier. It’s about building a strong foundation. Once you have that, everything else in drawing becomes more approachable. Keep your drawings straightforward, and you’ll soon see your skills grow.
2. Line Quality and Weight
After mastering the contour lines, the next step is understanding line quality. This is about how the thickness and darkness of your lines can convey more than just the shape. They start to speak of weight, texture, and light.
In this phase of learning, I discovered that a line is not just a line. A thin, lightly drawn line can suggest delicacy, while a thick, bold line might convey strength or shadow. This subtle shift in line weight can bring a simple drawing to life.
Experiment with this. Draw the same object multiple times, changing the line weight each time. Notice how the object seems different with each variation. A vase might appear heavier, more solid, or even ethereal, based solely on how you apply your lines.
It’s a powerful tool for a beginner. With just a slight variation in pressure on your pencil, you can create a range of effects. It teaches you to be intentional with your strokes, to think about what each line is saying. This awareness is crucial as you progress in your drawing journey.
3. Focused Details in Contour Drawing
The journey in drawing takes a subtle turn when you start adding details. But here's the key: you don't detail the whole drawing. You choose a small part, maybe where the light hits the strongest or where the shadows deepen.
I found this approach fascinating. By detailing just a section of your drawing, you create a focal point. Your viewer's eye is drawn there. The rest of your drawing supports this focal point, but it doesn’t compete for attention.
Choose a simple object, like a fruit or a shoe. Draw it with your contour lines. Then, pick a part to detail. It could be the texture on the skin of an apple or the laces of a shoe. Work on that part alone. Keep the rest simple.
This technique teaches restraint and focus. It shows how details can be powerful when used sparingly. It's not about filling every inch of your paper with lines. It’s about making those few detailed lines count. For a beginner, this method can create drawings that are striking yet manageable.
4. Multiple Imaging with Contour Lines
The next progression in your drawing journey is multiple imaging with contour lines. This is where you draw the same object several times, overlapping or in different positions. It's like capturing motion or the passage of time on a single piece of paper.
When I first tried this technique, it was like learning to see in a new dimension. You're not just drawing an object; you're capturing its potential movements, its different angles. A cup isn’t just static; it’s seen from above, the side, maybe even in the midst of being picked up.
Begin with something simple. An open book, a moving hand, or a turning key. Draw it once, then again slightly shifted. The lines will intersect, creating a sense of movement, of dynamism. This technique adds a lively, almost animated quality to your work.
For beginners, it’s a thrilling challenge. It pushes your understanding of form and space. It encourages you to think beyond the static and the singular. And importantly, it keeps your drawing practice fresh and engaging, constantly opening new doors of perception and skill.
Conclusion: The Value of Keeping It Simple
In the end, the journey of learning to draw circles back to one vital point: simplicity. It's about understanding the essence of what you see and capturing it without getting lost in complexities like photorealism or advanced rendering techniques.
Through my own journey, I've learned the importance of this approach. Keeping your drawings loose and gestural not only builds your skills but also keeps your passion for drawing alive. It’s about the joy of creation, the thrill of seeing your perspective take shape on paper.
For beginners, this approach is key. It allows you to produce a volume of work quickly, seeing visible improvements with each new drawing. This rapid progress is crucial. It fuels your motivation, pushing you to explore further, to draw more.
Remember, every great artist started with simple lines. It’s these foundations that build the artist. So, keep your drawings straightforward, your approach loose, and watch as your skills and love for drawing flourish.